Monday, December 5, 2016

Easy DIY Monogram Ornament

This sponsored post contains affiliate links.  Thanks for supporting Pitter & Glink!
Hey, y'all!  If you've followed my blog for a while, you know that I LOVE making Christmas decor, especially inexpensive, easy-to-make Christmas decor.  Today I have a DIY ornament tutorial for you that falls into both of those categories.  This ornament is part of a fun Ornament Challenge hosted by Expressions Vinyl.  Lots of talented bloggers have made ornaments using the Christmas Vinyl Theme Pack from Expressions Vinyl, and you get to vote for your favorite one over on the EV blog.  And while you're there, you can enter to win a $100 credit to Expressions Vinyl.  How cool is that?  Let me show you my ornaments so that you'll want to vote for me. *wink wink*
DIY Monogram Ornaments
Using some painted wooden disks, vinyl, and your Silhouette Cameo, you can create these beautiful monogram ornaments so easily.  The ornaments can even double as gift tags.  Let me show you how to make these.

Wednesday, December 21, 2016

Easy DIY Glitter Reindeer Ornaments

This Sizzix Design Team post contains affiliate links.  Thanks for supporting Pitter & Glink!
Hey, y'all!  Can you believe that Christmas is just a few days away?  I seriously cannot.  I always have grand plans for Christmas, but the holiday season always gets so busy that I don't have time to do everything I planned to do.  This makes me sad, but I try to give myself some grace.  I can only do what I can do, right?  Maybe you're feeling the same way, but you still want to do a little holiday crafting.  Well, today's post is for you.  I have a SUPER easy ornament tutorial for you.  I'm calling these my Easy DIY Reindeer Ornaments, and you can whip up several of these in no time.
Last Minute Christmas Craft Easy DIY Reindeer Ornaments
Also, you only need a few supplies to make these as well, which is always a plus.  Enough rambling.  Let's get to the tutorial!

Thursday, December 11, 2014

Recycled K-Cup Snowman Hat Ornaments

Hey, y'all!  I have such a cute project to share with you today.  I have a Keurig machine that my parents gave me for Christmas last year, and every morning I fix myself a cup of coffee before I head out the door to school.  Of course that means I have lots of empty K-Cups to trash or recycle.  I have been itching to find a way to upcyle some of them, and that's how my Snowman Hat Ornaments were born.
Recycled K-Cup Snowman Hat Ornaments pitterandglink.com
These little cuties are pretty easy to make.  You need minimal supplies to create them.

Supply List:
  • Used K-Cups
  • Empty snack box
  • Circle punch
  • Black spray paint
  • Hot glue gun and glue sticks
  • Twine
  • Trim & Embellishments
  • Scissors
  • Craft knife
Of course, the process begins with your used K-Cups.
Used K-Cups can become fun snowman hat ornaments.  pitterandglink.com
Tear the foil tops off of the K-Cups and remove the used coffee grounds and the coffee filter.  Wash the cups thoroughly and let them dry.  While they're drying, create the bottoms of the hats.
Use a recycled snack box to create snowman hat bottoms.  pitterandglink.com
Cut off the side of a snack box and use the circle punch to create the hat bottoms.
Spray painted K-Cups and cardboard circles become snowman hats.  pitterandglink.com
Spray the empty cups and the circles you punched with black spray paint.
Use twine to create a hook for a snowman hat ornament.  pitterandglink.com
Use your craft knife to punch a hole across from the hole already in the bottom of the cup.  Thread a length of twine through both holes and tie knot inside the cup.
Embellish the K-Cup hats with ribbon, rhinestones, and confetti.  pitterandglink.com
Use hot glue to attach the cup to the center of the spray-painted circle.  Once the glue sets, add your trim.  You can glue ribbon around the hat and use a rhinestone and tree table confetti to create holly for a traditional snowman look, or you can add other embellishments to create a nontraditional look.
Recycled K-Cup Snowman Hat Ornaments.  What a great upcycle! pitterandglink.com
I used ribbon, lace, rhinestones, stickers, and even book pages to create my unique little hats.
Recycled K-Cup Snowman Hat Ornaments.  What a great upcycle! pitterandglink.com
I think the book page and lace hat is my favorite, and the turquoise-y one makes me smile because it reminds me of the movie Elf.  Nonetheless, I am just thrilled with how all of them turned out.
Recycled K-Cup Snowman Hat Ornaments.  What a great upcycle! pitterandglink.com
Wouldn't this be such a fun craft night project?  I already want to make some more of them myself.  I'd love to see a picture if you make your own.  Post a pic to my FB page, tweet me, or tag me in an Instagram comment.

Sunday, December 18, 2011

{Gift Tag Ornaments}

Who doesn't like simple craft projects that look great?  I don't know of anyone...except maybe people that don't like crafts.  And those people should be institutionalized! ;)  I wanted to make my mom some ornaments for her tree this year.  She was feeling like her tree was missing something.  So I whipped up ten simple, inexpensive ornaments for her out of gift tags.  Now, of course, you can make these for the sole purpose of using as gift tags, but they are really cute as ornaments.  I started with metallic spray paint and ten large gift tags.


I sprayed the tags on both sides.  I made sure not to spray too much because I didn't want a curled up, warped paper mess.

Sunday, November 16, 2014

Handmade Deer Snow Globe Ornament

Hey, y'all!  A few weeks ago, a blog friend contacted me about participating in a handmade ornament blog hop.  I jumped at the chance because I love Christmas crafting, and making ornaments is one of my favorite Christmas crafts.  After getting some dollar store inspiration, I whipped up a deer snow globe ornament that I want to share with y'all today.
Create a beautiful snow globe ornament from a dollar store plastic wine glass! pitterandglink.com
And if you'll hang around until the end of the post, you can see lots more inspiration with links to over thirty other handmade ornaments from some very talented bloggers!
Over Thirty Handmade Christmas Ornaments from Talented Bloggers pitterandglink.com
But for now, back to my handmade ornament.  I love vintage ornaments, and I thought it would be fun to try to recreate that vintage Christmassy look when making my ornament.  I've seen a couple of people make snow globes and cloches out of plastic cups and glass candle holders, so I decided to try to make a snow globe ornament myself.  I found the material for the perfect "globe" at the dollar store.
Create a beautiful snow globe ornament from a dollar store plastic wine glass! pitterandglink.com
Plastic wine glasses!  That's right, y'all.  The glass part is perfect for a cloche or snow globe look.
All you have to do is separate the bottom of the plastic glass from the top.
Create a beautiful snow globe ornament from a dollar store plastic wine glass! pitterandglink.com
Drill a hole in the stem part of the glass.
Create a beautiful snow globe ornament from a dollar store plastic wine glass! pitterandglink.com
Thread an eye pin through the hole and create a loop at the top.  The cloche or globe part of the ornament is then complete, but I needed something pretty to go inside the globe.  I decided to create a little woodland deer scene.
Create a beautiful snow globe ornament from a dollar store plastic wine glass! pitterandglink.com
I found a jar in my craft stash that was a just a little larger than the bottom of my new plastic cloche.  I traced it on a recycled box and cut it out.
Create a beautiful snow globe ornament from a dollar store plastic wine glass! pitterandglink.com
I painted the circle with several coats of white paint.
Create a beautiful snow globe ornament from a dollar store plastic wine glass! pitterandglink.com
I coated the circle with sparkle Mod Podge and sprinkled different types of snowy glitter on top.  I actually did a couple of layers of this to make sure I had LOTS of glitter.
Create a beautiful snow globe ornament from a dollar store plastic wine glass! pitterandglink.com
I used hot glue to attach two tiny bottle brush trees and a tiny fawn to the glittered circle.  I made sure to sprinkle glitter on top of the hot glue to help camouflage it.  I also put a little sparkle Mod Podge and snowy glitter on the trees as well and glued a small piece of trim around the deer's neck to give him a little tiny scarf.
Create a beautiful snow globe ornament from a dollar store plastic wine glass! pitterandglink.com
I sprinkled extra glitter on the entire scene, deer and all, and I used hot glue to attach the plastic cloche to the base that I created.  Then I used hot glue to attach tinselly trim around the bottom of the ornament.
Create a beautiful snow globe ornament from a dollar store plastic wine glass! pitterandglink.com
And because I always think more is more, I used hot glue to attach a few pieces of trim and a big bow to the top of the ornament.
I LOVE how my ornament turned out.  It looks great hung on a tree or displayed on my dollar store cupcake stand.
A beautiful vintage-inspired handmade snow globe ornament from pitterandglink.com.
Who would guess that this lovely vintage-looking ornament started its life as a plastic dollar store wine glass?!

Create a beautiful snow globe ornament from a dollar store plastic wine glass! pitterandglink.com
And now for the lots more handmade ornament inspiration!  Check out all of these fabulous ideas from my bloggy friends.


I don't know about y'all, but I'm totally inspired now and ready to create LOTS of new ornaments for my Christmas tree.  Now to find some extra time in the day...  ;)

Friday, December 13, 2013

{Deer Silhouette Ornament from a Recycled Gift Box}

Hey, y'all!  As a crafter who likes to repurpose items whenever I can, I have a stockpile of empty boxes and containers in my craft room that take up way more space than I'd like to admit.  Around Christmastime, I like to try to recycle those items into unique ornaments. (Remember by Recycled Juice Carton Ornament and my Gift Box Ornaments?)  This year I decided to make another version of my gift box ornaments.
Create a Deer Silhouette Ornament from a recycled gift box using this tutorial from Pitter & Glink! #DIYOrnament #Christmascraft
I began by selecting a gift box top that was the perfect size for an ornament.
Create a Deer Silhouette Ornament from a recycled gift box using this tutorial from Pitter & Glink! #DIYOrnament #Christmascraft
I painted the inside with red paint.
Create a Deer Silhouette Ornament from a recycled gift box using this tutorial from Pitter & Glink! #DIYOrnament #Christmascraft
After that dried, I covered the outside with a festive washi tape.
Create a Deer Silhouette Ornament from a recycled gift box using this tutorial from Pitter & Glink! #DIYOrnament #Christmascraft
I then covered the washi tape with a layer of sparkle Mod Podge to keep the tape from peeling up and, well, just because everything is better with glitter.
Create a Deer Silhouette Ornament from a recycled gift box using this tutorial from Pitter & Glink! #DIYOrnament #Christmascraft
Then I started working on the deer Silhouette.
Create a Deer Silhouette Ornament from a recycled gift box using this tutorial from Pitter & Glink! #DIYOrnament #Christmascraft
I printed a deer silhouette that I found using a Google image search.  (It's the same silhouette I used for my Reindeer Silhouette Embroidery Hoop Art.)  I printed the silhouette out in a size that would fit well in the box top.  I used double stick tape to stick the printed deer on a piece of recycled cardboard, and then I cut out the deer with a craft knife.
Create a Deer Silhouette Ornament from a recycled gift box using this tutorial from Pitter & Glink! #DIYOrnament #Christmascraft
I painted the deer with a coat of primer (gesso) followed by two coats of green paint.  Then I covered it with a layer of green glitter mixed with Mod Podge.
Create a Deer Silhouette Ornament from a recycled gift box using this tutorial from Pitter & Glink! #DIYOrnament #Christmascraft
I used hot glue to glue the glittered deer to the box.  I also glued some pom-pom trim to the inside edges of the box.
Create a Deer Silhouette Ornament from a recycled gift box using this tutorial from Pitter & Glink! #DIYOrnament #Christmascraft
I tied some embroidery floss in a loop, threaded that through a wooden bead, and glued that to the top of the box to create a hanger for the ornament.
Create a Deer Silhouette Ornament from a recycled gift box using this tutorial from Pitter & Glink! #DIYOrnament #Christmascraft
I love the Christmas colors and the sparkly deer, but what I love most is that I was able to recycle something that would have otherwise been put in the trash.  
If you want more handmade ornament inspiration, be sure to check out Stephanie Lynn's handmade ornament series over at Under the Table and Dreaming
Handmade Ornament Ideas
I had the pleasure of posting an ornament earlier in the week as part of the series, and there have been so many other awesome ornaments other creative bloggers have shared.  Inspiration is coming out of the wazoo over there, and you don't want to miss it!  Happy crafting!

Monday, December 9, 2013

{DIY Christmas Nativity Card}

Hey, y'all!  Do you send out Christmas cards?  I don't normally because I never remember to mail them in time, but I love to have cute cards on hand in case I need to give one to someone as part as a gift.  This DIY Nativity card is something that can easily be made with the help of a Silhouette.  And if you hang around to read this entire post, after the tutorial you'll find links to thirty-four other Silhouette projects AND an AWESOME giveaway! 
DIY Nativity Silhouette Christmas Card from Pitter and Glink and 35 inspirational Silhouette projects from other talented bloggers!
I began the card by creating my design with my Silhouette software.  Here's the steps I followed:
1.  I drew two rectangles--one inside the other--to create a frame.  The outside of your frame needs to be the size of the front of your card.
2.  I opened a nativity design (#52103) from the Silhouette store.  The design contains all of the people and animals you would expect to be in a nativity set.
3.  I ungrouped the shapes and deleted all the ones I wasn't going to use.  I kept Mary, Joseph, Baby Jesus, the large star, and the little stars.
4.  I then selected Mary, Joseph, and Baby Jesus and grouped them back together.DIY Nativity Silhouette Christmas Card from Pitter and Glink and 35 inspirational Silhouette projects from other talented bloggers!  http://www.Pitterandglink.blogspot.com
5.  I positioned them and the large star within the frame that I had created.
DIY Nativity Silhouette Christmas Card from Pitter and Glink and 35 inspirational Silhouette projects from other talented bloggers!  http://www.Pitterandglink.blogspot.com
6.  I selected those and the inner rectangle and used the "Subtract All" tool found under the Modify icon to get rid of all the extra cut lines that would keep my design from being one piece.
DIY Nativity Silhouette Christmas Card from Pitter and Glink and 35 inspirational Silhouette projects from other talented bloggers!  http://www.Pitterandglink.blogspot.com
I was then left with the image above.  (Please note that if you need to move or resize the design after you finish this step you will need to group all the pieces together.) 
7.  I added a few of the smaller stars to the background and cut the design with my Silhouette.  
DIY Nativity Silhouette Christmas Card from Pitter and Glink and 35 inspirational Silhouette projects from other talented bloggers!  http://www.Pitterandglink.blogspot.com
The process may seem like a lot of work, but it really wasn't.  It took more work to explain the process in this post than it did to actually create the design.  
DIY Nativity Silhouette Christmas Card from Pitter and Glink and 35 inspirational Silhouette projects from other talented bloggers!  http://www.Pitterandglink.blogspot.com
The rest of the process of creating the card was even easier.  I folded a piece of card stock to create a card, and I used double sided tape to adhere a piece of glitter card stock to the front of the card.  I then taped and glued my nativity scene to that.
DIY Nativity Silhouette Christmas Card from Pitter and Glink and 35 inspirational Silhouette projects from other talented bloggers!  http://www.Pitterandglink.blogspot.com
I glued on the extra stars and some rhinestones to complete my card.
DIY Nativity Silhouette Christmas Card from Pitter and Glink and 35 inspirational Silhouette projects from other talented bloggers!  http://www.Pitterandglink.blogspot.com
I love the way it turned out!  I've been guilty of normally only using my Silhouette to create stencils, so it was fun to use it for something different.  
Are you like me and need more inspiration to create projects with your Silhouette?  Well, this part of the post is just for you.  I have teamed up with thirty-four other bloggers to share links to some amazing Silhouette projects with you.  The projects are part of what's called the Silhouette Challenge.  Check out the links below!
DIY Nativity Silhouette Christmas Card from Pitter and Glink and 35 inspirational Silhouette projects from other talented bloggers!  http://www.Pitterandglink.blogspot.com
  1. 2013 Snowman Christmas Card by Please Excuse My Craftermath...
  2. Christmas Hoop Art by Lil' Mrs. Tori
  3. Silhouette Nativity Advent Candle Box by One Tough Mother
  4. Christmas Party Photo Booth Props by unOriginal Mom
  5. Another Stenciled Tea Towel by Cutesy Crafts
  6. Silhouette Gift Tags by Rain on a Tin Roof
  7. Snowflake Pin / Ornament by Coley's Corner
  8. State Sign Couple Gift by It Happens in a Blink
  9. Mason Jar Christmas Ornaments by Vintage News Junkie
  10. Merry Christmas Wall Decor by One Artsy Mama
  11. Deer Head Holiday Banner...featuring Santa's Reindeer by The Thinking Closet
  12. Restore your UGGS (with PAINT) by From Wine to Whine
  13. Monogrammed Snowflake Ornaments by Architecture of a Mom
  14. Christmas Countdown Sign by The Girl Creative
  15. Elf Chalk Sign: "The Best Way to Spread Christmas" by Weekend Craft
  16. Glittery Christmas Subway Art by The Turquoise Home
  17. Sketch Pen Labels by Sowdering About in Seattle
  18. Snowflake NOEL Sign by My Favorite Finds
  19. DIY Holiday Hostess Gift by Everyday Paper
  20. Folding Nativity Backdrop by Chicken Scratch NY
  21. Recycled Glass Jar Advent Calendar by Nearly Handmade
  22. Reindeer Card: Double-Sided Print & Cut by GetSilvered
  23. Personalized Block Ornament by Suburble
  24. Paper Medallion Christmas Tree by Create & Babble
  25. Mini Mid-Century Homes by Tried & True
  26. Glitter and Vinyl Minecraft Christmas Ornament by A Tossed Salad Life
  27. DIY Countdown to Christmas Refrigerator Style by My Paper Craze
  28. Reversible Recipe Holder/Block Frame by The Sensory Emporium
  29. DIY: Lettered Christmas Pillows by The House on Hillbrook
  30. Simply Charming Christmas Ornaments by Life After Laundry
  31. No Glitter was Worn by GiveMeAPaintbrush
  32. Make Easy Ornaments from Paper Circles by Bringing Creativity to Life
  33. Cutting Machine Embroidery Applique by Terri Johnson Creates
  34. "Believe" Christmas Banner by Daily Dwelling
  35. DIY Christmas Nativity Card by Pitter and Glink
Do you have a Silhouette machine?  Looking for Silhouette inspiration, support, or trouble-shooting? Interested in joining us for our group posting event next month? Then we'd love to have you join our Silhouette Challenge Facebook group. 
The Silhouette Challenge FB Group--Learn how to join at http://www.Pitterandglink.blogspot.com!
To join, simply fill out the new member request form, and Lauren from The Thinking Closet will get you squared away.

Amazing inspiration, right?!  Well, maybe you were reading this post, and you were sad because you don't have a Silhouette to create these projects.  You're in luck!  Along with today's post, the Silhouette Challenge Group is also hosting a giveaway.  One lucky person will win a $155 Amazon gift card that she can use to purchase her very own Silhouette!
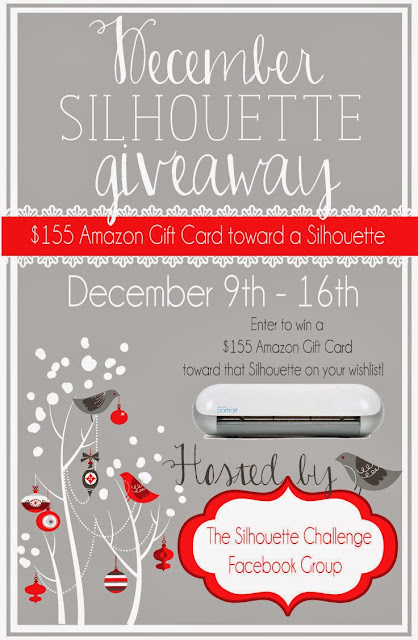
December Silhouette #Giveaway hosted by the Silhouette Challenge Facebook Group .  Enter to win a $155 Amazon gift card toward a Silhouette.  Giveaway runs from December 9, 2013 to December 16, 2013.  Enter at http://www.Pitterandglink.blogspot.com!
Thirty-one members of the Silhouette Challenge group made this giveaway possible, so there are thirty-one potential entries per person.  Please note that the giveaway runs from  Monday, December 9th - Monday, December 16th at 11:59 pm eastern.  This international-friendly giveaway is open to anyone 18 years of age and older.  The winner will be contacted by Lauren from The Thinking Closet by email and will have 48 hours to respond, so watch your spam folders!  The rest of the giveaway terms and conditions can be found in the Rafflecopter widget below.