Saturday, December 2, 2017

My Five Favorite Drugstore Makeup Products

This post contains affiliate links.  Thanks for supporting Pitter & Glink!
Hey, y'all!  I feel like it's been forever since I posted something new here!  If you follow me on Instagram, you know that at the end of October, my husband and I adopted a beautiful baby boy, so my life recently has been filled with diaper changes, feedings, and trying to get sleep when possible.  I haven't had much time for being creative, but I'm starting to somewhat get the hang of things, and I hope to have some new creative tutorials coming in the near future.  Besides being creative, I also LOVE makeup, and I love to share products I like with people over on Instagram.  I recently did a poll asking if people would like me to write a post about my favorite drugstore makeup products, and the answer was YES.  That's what today's post is all about: my five favorite drugstore makeup products!
My 5 Favorite Drugstore Makeup Products
I'm going to write about each product and why I love it.  I should mention before I get started that every face and skin type is different, so something I love might not necessarily work for you, so please don't get angry with me if you try a product and it just doesn't work for you.  When I talk about the products, I'm going to link to them using affiliate links.  If you choose to purchase a product through my link, a small part of the purchase price will go toward helping to support my blog at no extra cost to you.  (Thanks!)  But you can find the products in stores like Walmart, Target, and CVS too, so shop wherever you like.  Okay...on to the products!

Thursday, August 21, 2014

{DIY Stenciled Watercolor Makeup Pouch}

Hey, y'all! Today is that special day of the month where I join My Favorite Bloggers to share a themed project and offer y'all an awesome giveaway!  This month's theme is Pinterest-inspired projects, and if you'll hang with me until the end of the post, there will be a $35 Starbucks gift card giveaway to enter.  But first, let's talk about my Pinterest-inspired project.
There are many makeup pouch pins on Pinterest, and my favorite comes from Minted Strawberry, which is one of my new blog crushes by the way.  There are also LOTS of pins on Pinterest about how to tie dye t-shirts with Sharpies.  I was inspired by the one from All Things Thrifty.  These tie-dyed t-shirts remind me of watercolors, so I thought a stenciled watercolor pouch would be a great project to create.
I purchased a small pouch from Hobby Lobby to use for this project.  The first step of the project is creating the watercolor effect on the pouch.
To do that, you need Sharpies and alcohol, which you should put in a spray bottle.  If you only want to color one side of your pouch, you'll need a piece of cardboard or card stock to put inside the pouch as well.  (I wanted my front design to bleed onto the back, so I didn't use an insert.)
Begin the watercolor process by scribbling on the bag with the Sharpies.  I did horizontal scribbles because that's the look I was going for.
 Once you get your bag covered with scribbles, spray it with the alcohol.  I soaked mine, but I guess depending on the look you wanted, you could use less.  Once the pouch dried, I thought the markers faded a little too much, so I repeated the process.
I did lots of scribbling the second time, as seen in the picture, and then sprayed the bag with the alcohol again.  I was happier with the pouch this time and used a hair dryer to dry it completely.
Above is what it looked like when it dried.  I think it looks a lot like watercolor, don't you?
Since I wanted to stencil the pouch, I used my handy-dandy Silhouette to cut a stencil of a quote I've always liked from Audrey Hepburn.
I used transfer paper to help adhere the stencil to the pouch.
I then used a dry brush technique to stencil in the design.
While my design was drying, I decided the cherry on top of my bag would be a tassel.
A while back, I bought this braided mason line from Lowe's.  I've been dying to use it on something, so I knew that it would be PERFECT for a tassel.
Making a tassel is a lot like making a pom pom.  I cut a length of the string and placed it horizontally on a piece of card stock.  I wrapped the string around and around vertically until I thought it was enough to make a thick tassel.  I cut the string that was leftover off and carefully slid the wrapped string off of the card stock.
I then wrapped a piece of mint embroidery floss around the top of the string and tied it tight.  I cut all the loops at the bottom and used a match to very carefully melt the ends of the strings so they wouldn't ravel later.  (You can only hold the flame to the end of the strings for like a second; otherwise, the strings will blacken.)
After I tied the tassel to the pouch, my makeup bag was finished.  I LOVE the finished pouch.
I think having the Audrey quote on my makeup bag will remind me that it's not really all about the makeup.  A smile is really the prettiest thing a girl can put on her face.  (Remember how last week, I reminded you that you're perfect just the way you are?)  I actually think it would be fun to use this little pouch as a clutch too, and this would be great to give as a gift as well!
So now that you've seen my Pinterest-inspired project, check out the other great Pinterest-inspired projects from some of My Favorite Bloggers!
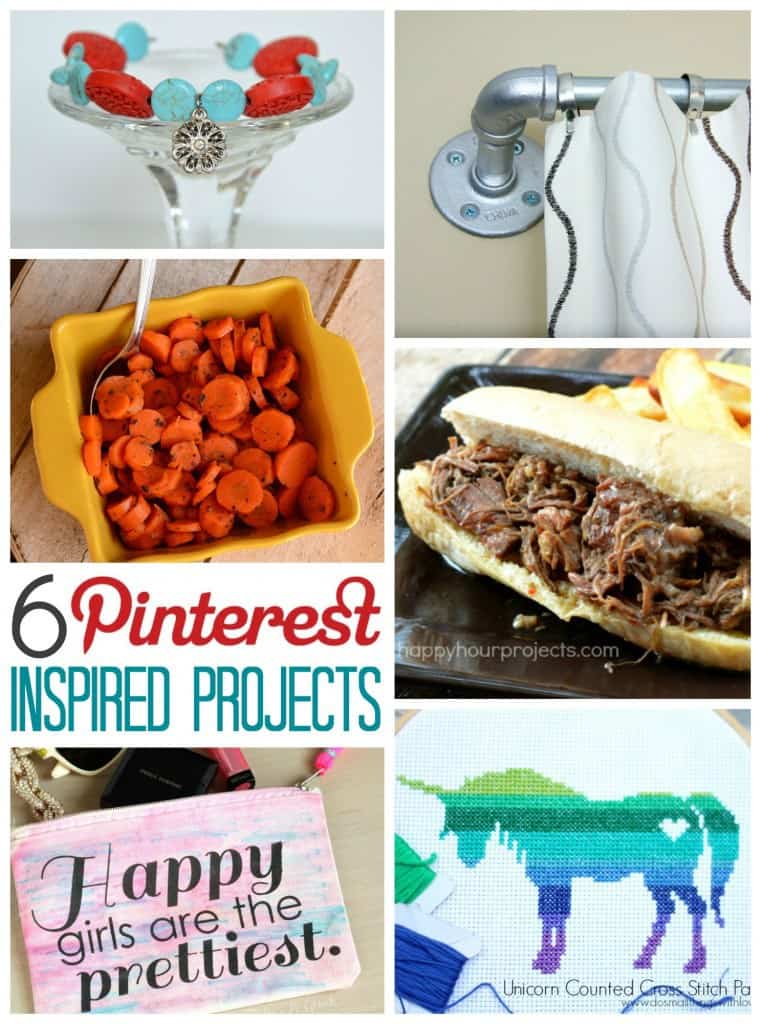
6 Pinterest Inspired Projects
Red & Turquoise Memory Wire Bracelet by Kirsten at Sweet Tea and Saving Grace / Steamed Honey Glazed Carrot Medallions by Melanie at It Happens in a Blink / Pipe Curtain Rods by Kara at Happy Go Lucky / Slow Cooker Italian Beef by Adrianne at Happy Hour Projects / Stenciled Watercolor Makeup Pouch by Bethany at Pitter and Glink / Unicorn Counted Cross Stitch Pattern by Nancy at Do Small Things with Love
And now, the moment you've been waiting for...giveaway time!  You can enter to win a $35 Starbucks gift card using Rafflecopter below.

a Rafflecopter giveaway 
Good luck!

Monday, February 18, 2013

{Three Must Have Lipsticks}

Hey, y'all!  I don't think I've ever told you about how much I love makeup.  When I am feeling a little frumpy, I always feel so much better about myself if I put on some makeup--especially lipstick.  So today I want to share my three favorite lipsticks with y'all.
Some are a little more expensive than others, but they all are very affordable.  Here they are!
I have a big smile, and I like red lipstick.  That could be a scary combination.  (Think of the Joker, and you can easily understand how red lipstick can go horribly wrong on someone with a big smile.)  I love this shade of red lipstick because it isn't clown red, and the actual lipstick itself is very creamy and has staying power.  Find it {HERE}.  (I don't see Red Hot listed on the color chart, but if you go to a local Merle Norman, I'm sure they can show you a color that's almost exactly the same as this one.)
Sometimes I want to wear a pretty bright pink lipstick, and this lipgloss fits that need.  It is bright enough for people to know you have on bright pink lip color, but it's not so bright that it's obnoxious.  It's also a nice texture and stays on well.  Find it {HERE}, but it's probably cheaper at your local Walmart or drugstore.
This is my ultimate, all-time-favorite number one lipstick!  This lipstick--or lip pencil--has a lipliner on one side and a lip color on the other.  You can line just the outside of your lips and then use the lip color if you want a lighter pink, or you can line your entire lip and then use the lip color if you want a darker pink.  This is what I wear on my lips almost every day, and, especially if I use the lipliner, it stays on for a long time!  Find it {HERE}.
I've shared my three must have lipsticks with you.  What is your go-to lipstick?  Please share it with me because I'd love to find some new favorites!  :)