Monday, March 9, 2015

DIY "Make Pretty Things" Graphic Tee

Hey, y'all!  If you're reading this, you probably like to make things.  Am I right?  I know I do.  When I have a day where I can craft all day long, it makes me so happy.  A quote I've heard that fits my life is, "I Just Want to Make Pretty Things."  Making pretty things makes me happy.  So when this month's Silhouette Challenge theme was Typography/Word Art, I decided a graphic tee with that life-fitting quote was the perfect project to make.  Today I'm going to show you how I made it, and I'm offering you the free cut file so that you can make your own.  Please be sure to stick around until the end of the post where you'll find 21 other Silhouette word art projects to inspire you.
DIY "Make Pretty Things" Graphic Tee--Get the free cut file to make your own! pitterandglink.com
If you want to make your own graphic tee, you'll need a T-shirt and heat transfer vinyl.
A plain tee and heat transfer material become a chic graphic tee! pitterandglink.com
I bought a roll of gold vinyl from Silhouette when they had their big Black Friday sale, and my T-shirt came from Belk.
"I Just Want to Make Pretty Things" Free Silhouette Cut File from pitterandglink.com
Of course, you'll need a design to cut from the vinyl, so I'm giving you the "I Just Want to Make Pretty Things" word art graphic I created.
Mirror a graphic before cutting it from heat transfer vinyl.  pitterandglink.com
You can download the graphic {HERE}.  I've already reversed the design for you so that you can simply cut it with your Silhouette.  (If you'd like to use the design for another project, you'll just need to mirror it to "un-reverse" it.)
Use your Silhouette to cut heat transfer material and make a fab shirt! pitterandglink.com
To cut my HTV, I used the machine setting for regular Silhouette heat transfer material.  (If you're not sure what settings to use to cut your vinyl, you can always start with the machine settings and do a test cut first.)  I cut the vinyl without using the mat.  
Note: When using HTV, remember to cut it with the shiny side down.
Weed your design before ironing on your t-shirt. pitterandglink.com
Once my HTV was cut, I weeded the design.  I don't have a fancy weeding tool, so I just always use my craft knife.
Follow HTV package directions to iron your design on your tee. pitterandglink.com
After I weeded the design, I centered it onto my T-shirt and ironed it on following the HTV package directions.
"I Just Want to Make Pretty Things" DIY Graphic Tee from pitterandglink.com
Don't you just love my new shirt?  I feel like it looks like a fancy graphic tee you'd buy from a chic store.
DIY "Make Pretty Things" Graphic Tee--Use the free cut file in post to make your own! pitterandglink.com
Side Note: Photographing metallic lettering on a tee is hard work, y'all.  Acting like a goofball because I don't always know how to pose in front of the camera is not.  ;)
Excited about creating? Make a DIY graphic tee to show everyone.  (Free cut file in post.) pitterandglink.com
I'm excited (can't you tell?) about the fact that now YOU can easily make your own totally fabulous graphic tee that will make you feel just as excited as I am.
A plain tee and HTV can become a pretty graphic tee with the help of your Silhouette. (Free cut file in post.) pitterandglink.com

Want to Check Out More Silhouette Projects?


My Silhouette Challenge buddies and I are all sharing projects on our blogs today, so peruse the projects below for a wealth of Silhouette inspiration!
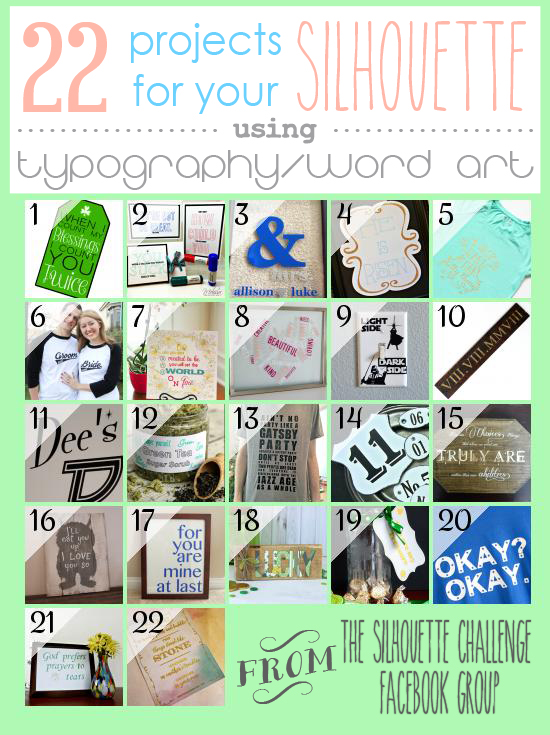
St. Patrick's Day Gift Tag with {FREE Cut File}The Fine PrintMr. and Mrs. Word ArtHe is Risen Easter Silhouette ArtDIY "Make Pretty Things" Graphic TeeBride & Groom Baseball ShirtsUsing Sketch Pens (and Markers!) For BeginnersHeart Shaped Vinyl Word ArtStar Wars Light Switch - Silhouette ChallengePallet Wood Roman Numeral Anniversary Signhow to cut LARGE Vinyl DecalsCreating Labels with Sketch Pens - March Silhouette ChallengeAin't No Party Like A Gatsby Party T-ShirtDIY Faux Enamel TagsHarry Potter Word ArtWhere the Wild Things Are Pallet Sign"At Last" Framed Vinyl Word ArtLucky Pallet SignSt. Patrick's Day Etched Glass Jar GiftThe Fault In Our Stars Inspired Shirt - Okay? Okay.Silhouette Craft Projects: Framed Irish ProverbSketch out an Inspiring Quote
1. My Paper Craze // 2. The Stamp Doc // 3. Peanut Life Adventures // 4. Creative Ramblings // 5. Pitter and Glink // 6. The Thinking Closet // 7. Single Yet Married Mom // 8. unOriginalMom // 9. Sisters, What! // 10. Where The Smiles Have Been // 11. From Whine to Whine // 12. Adventures in All Things Food // 13. Practically Functional // 14. Patina Paradise // 15. Please Excuse My Craftermath... // 16. Weekend Craft // 17. Two Purple Couches // 18. Ribbons & Glue // 19. TitiCrafty // 20. Simply Kelly Designs // 21. Confessions of an Overworked Mom // 22. Get Silvered
With all these great projects to look at, I hope you feel inspired to whip up a Silhouette project of your own soon.  Happy crafting!
Related Posts:
Stenciled Faux Watercolor Makeup Pouch

Monday, January 12, 2015

Organizing Makeup with Style: A Monogrammed Makeup Case

Hey, y'all!  Do you jump on the whole "I want to be more organized for the new year" bandwagon?  I have a front seat on the wagon every year, but somewhere along the way I always fall off.  This year, I decided that I wanted to stay on the wagon for a while.  I'm pretty unorganized in general, but one important part of my life REALLY lacking in the organization area was my makeup.  I just love makeup, but my makeup organization?  Less than stellar.  So I recently used my Silhouette to personalize myself a makeup case worthy of my sparkly eye shadow and red lipstick!  Check out my monogrammed makeup case, and stick around until the end of the post to see thirty-two other organization projects using the Silhouette!
Personalize a plain makeup case with a Silhouette-cut monogram and quote.  pitterandglink.com
I began the makeup organization process by purchasing a clear makeup case from Walmart.
A plain makeup case just waiting on a makeover.  www.pitterandglink.com
It was cute as is, but I knew it needed some of my personality infused in it, so I turned to my trusty Silhouette.
A monogram and quote designed in the Silhouette program.  www.pitterandglink.com
I created a monogram for the top of the case using a free monogram app on my phone.  I emailed me monogram to myself and traced it with the my Silhouette software.  I sized it to fit the middle of my makeup case.  I created the fun little quote using the fonts Catalina Avalon Slab and Dality Alternative.  I sized it to fit the space on the back of the makeup case.
Use Silhouette-cut vinyl to personalize a plain makeup case.  www.pitterandglink.com
I cut the monogram and quote from pink Oracle 651 vinyl.
Adhere vinyl to a plain makeup case to personalize it.  www.pitterandglink.com
I used transfer paper to apply the quote to the back.  (Tip: You can use an old plastic card to smooth your transfer tape on your vinyl.)
Adhere a vinyl monogram to a plain makeup case to personalize it.  www.pitterandglink.com
And I did the same with the monogram on the top.
Organize your makeup with style in this monogrammed makeup case.  www.pitterandglink.com
I just LOVE how the makeup case turned out.  It's the perfect size to hold the makeup I use daily.
A cute personalized makeup case using vinyl and a Silhouette.  www.pitterandglink.com
If you know me, you know the quote on the back is perfect for me because I just LOVE lipstick, especially bright lipstick.
Personalize a plain makeup case with a vinyl monogram and quote.  A great Silhouette project!  www.pitterandglink.com
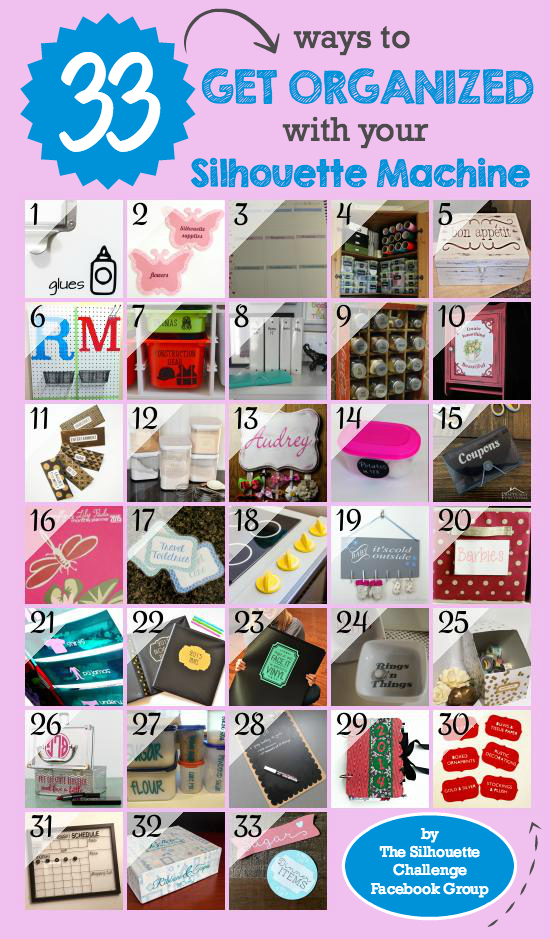
I smile every morning when I get this cute little case out, and my makeup is much easier to use now that I can see it all. And just as promised, I have lots of other organization inspiration for you today in the form of this clickable collage filled with projects from my Silhouette Challenge buddies.  Check out thirty-two other organization ideas below.

Organizing With Icons Butterfly Labels Customizing Your Erin Condren Life Planner Weekly Layout Organizing Your Craft Supplies with Labels Weekly Menu Box Peg Board Entry Way Order In Kid Land A Fun Way to Label Binders Sugar and Spice Looking Oh So Nice Turning a Plain Cabinet into Something Beautiful DIY Cash Budget Envelopes Flour and Sugar Pantry Container Labels Personalized Hair Bow Organizer Organize your Refrigerator DIY Vinyl Decorated Coupon Organizer 2015 Blog Planner Designed For Dragonfly & Lily Pads Laminated Labels with Your Silhouette The Secrets of How We Built Our DIY Play Kitchen Creative Way to Dry Winter Mittens Organizing Canvas Toy Bins with Labels Kids Closet Storage {with Rubbermaid Drawer Dresser and Vinyl Labels} Cute Gold Binder Labels {2015 Organization} Easy Vinyl Storage Organization and TWO Free Cut Files Personalized Ring Holders Upcycle for Organization Organizing Makeup with Style: A Monogrammed Makeup Case Vinyl Tupperware Labels How to Make a Chalkboard Clipboard Christmas Card Memory Book Simple DIY Holiday Storage Labels DIY Vinyl Frame Calendar with {FREE CUT FILE} Ribbons & Tapes Upcycled Organizing Box Print and Cut Pantry Labels
1. Please Excuse My Craftermath... // 2. Simply Kelly Designs // 3. Daily Dwelling // 4. Ginger Snap Crafts // 5. Our Southern Home // 6. Sowdering About // 7. The Moberg Family // 8. Decor Adventures // 9. Pineapples and Pinecones // 10. Patina Paradise // 11. The Thinking Closet // 12. It Happens in a Blink // 13. Adventures in All Things Food // 14. From Wine to Whine // 15. Practically Functional // 16. Dragonfly & Lily Pads // 17. unOriginal Mom // 18. One Dog Woof // 19. Creative Ramblings // 20. My Favorite Finds // 21. Create it. Go! // 22. A Prudent Life // 23. Where The Smiles Have Been // 24. Barb's Life // 25. Everyday Paper // 26. Pitter and Glink // 27. Peanut Life Adventures // 28. Feto Soap Blog // 29. Our Rosey Life // 30. Two Purple Couches // 31. My Paper Craze // 32. TitiCrafty // 33. Lil Mrs Tori

Maybe with all this inspiration I can stay organized a little longer into the new year than usual.  Happy crafting!
Related Posts:
Sharpie-decorated Ring Dish

Monday, November 10, 2014

Mini Notepads: A DIY Gift Idea

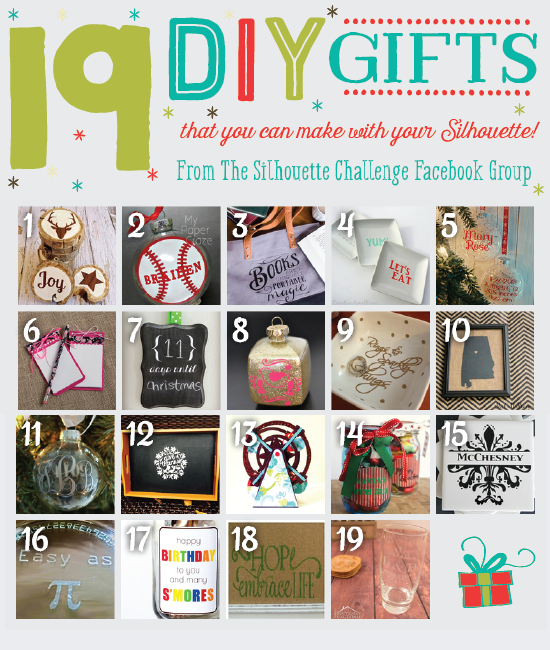
Hey, y'all!  Since the holidays are right around the corner, I have joined my Silhouette Challenge friends to share nineteen great DIY gift ideas with you today that can be made with the help of your trusty Silhouette.  I'm sharing some DIY Mini Notepads that would be great gifts for teachers or coworkers.  And the best part is that they're really easy to make.
DIY Mini Notepads with Free Silhouette Cut File via pitterandglink.com
The very first step to making your own DIY mini notepads is to download the free notepad cover cut file I created for you.  You can download the file HERE.
DIY Mini Notepads with Free Silhouette Cut File via pitterandglink.com
After you download the file, open it in your Silhouette program.  There are two notepad cover styles in the file.  You can cut both of them or one or multiples of different ones, and you can resize them to whatever dimensions you'd like.  You can even ungroup the pieces of the cover and customize them a little by putting your own design on the top of the cover.
DIY Mini Notepads with Free Silhouette Cut File via pitterandglink.com
When you have the notepad covers like you want them, cut them from card stock or Silhouette chipboard with your machine.
DIY Mini Notepads with Free Silhouette Cut File via pitterandglink.com
Fold the covers on the perforated lines.  Then cut blank paper a little smaller than the size of the back of the notepad cover.  (I cut my paper a quarter inch smaller than the back of the notepad cover.)  Make sure you don't cut it too small, though, or you won't have room to punch holes in the blank paper, which is the next step.  Place your stack of blank paper in the notebook cover and center it.  Trace the holes on the cover onto the blank paper.  Use a hole punch to punch all the blank pages.
DIY Mini Notepads with Free Silhouette Cut File via pitterandglink.com
After the holes are punched, put the blank pages back into the notepad cover.  Line up the holes and thread twine through them and tie in a bow.  (You could also use scrapbook brads if you wanted to get even fancier.)  If you'd like, you can embellish the top of the cover with washi tape and maybe even wrap a pencil with the same washi tape to create a matching set.
DIY Mini Notepads: A Handmade Gift Idea.  Get the free notepad cover cut file at pitterandglink.com.
These little notebooks are so cute and easy to make.  The longest part of the process is cutting the blank pages, but that can be done more quickly with a different paper cutter.  (You know the type that's like a paper guillotine?)
Want to Check Out More Silhouette Projects?

Monday, July 14, 2014

{Monogram It: A Memo Board Makeover}

Hey, y'all!  Do you have unloved stuff in your closets just waiting for a makeover?  I have stuff pretty much everywhere waiting for a makeover.  My hoarding tendencies cause me to buy all types of things and store them until I decide to make them over.  It really gets annoying after a while, and I just decide that it's either make it over or throw it out.  I've had a cork board in my closet for a couple of years now.  It was in my craft room before I did the huge craft room makeover.  It didn't make the cut in the new room, and it's just been hanging out in the top of the closet ever since.  This week I decided that it needed a makeover, and I needed a memo board near my computer, so it has now been transformed into a lovely monogrammed memo board.
Makeover a plain memo board with spray paint and a vinyl monogram used as a reverse stencil. pitterandglink.com #monogram #Silhouette
This is the sad little memo board before.
Makeover a plain memo board with spray paint and a vinyl monogram used as a reverse stencil. pitterandglink.com #monogram #Silhouette
The first thing I did to the board was tape the middle off so that I could spray paint the wood frame.  I used blue painter's tape and newspaper to cover the entire middle of the board.
Makeover a plain memo board with spray paint and a vinyl monogram used as a reverse stencil. pitterandglink.com #monogram #Silhouette
I spray painted the frame with Krylon's gold metallic spray paint.  I'm going to skip a few steps now because there was a craft fail in the middle.  We're just going to pretend like it didn't happen.  After the fail, I taped of the frame of the board.
Makeover a plain memo board with spray paint and a vinyl monogram used as a reverse stencil. pitterandglink.com #monogram #Silhouette
I sprayed the cork part of the board with white spray paint.  Then I cut a monogram from vinyl with my Silhouette.  (You can learn how to create a monogram with your Silhouette in this post.)  Cutting vinyl with my Silhouette is definitely my favorite use for my Silhouette because I can create decals, stencils, and reverse stencils, which is what I used for this project.
Makeover a plain memo board with spray paint and a vinyl monogram used as a reverse stencil. pitterandglink.com #monogram #Silhouette
I transferred the monogram to the bottom left corner of my memo board.  (I should have used a different color vinyl so that you could see the monogram better, but hopefully you can still see the white on white.)  I taped around the monogram so that I would have a rectangle roughly 1/4 the size of the cork part of the board.
Makeover a plain memo board with spray paint and a vinyl monogram used as a reverse stencil. pitterandglink.com #monogram #Silhouette
I then sprayed that section with Valspar's spray paint in nautical.  (It's the same spray paint I used for my Thrift Store Lamp Makeover.)  White the paint was still a bit tacky, I removed all the tape and the monogram sticker.  I normally do this to keep the paint from peeling, which can happen sometimes when the paint is completely dry.  I had a few places where the white needed a touch up, so I just used craft paint and a small brush to fix those places.  There was one place where a little of the white spray paint got on the inside edge of the gold frame.  I used a gold Sharpie to correct that.  Then my memo board makeover was complete!
Makeover a plain memo board with spray paint and a vinyl monogram used as a reverse stencil. pitterandglink.com #monogram #Silhouette
Isn't it fun?  The push pins are simply gold tacks with pieces of my Polymer Clay Faux Agate super glued on.  They pull together all the colors that I used on the memo board.
Makeover a plain memo board with spray paint and a vinyl monogram used as a reverse stencil. pitterandglink.com #monogram #Silhouette
I'm going to attach the memo board to the inside of my computer armoire that's in the living room.  The board is going to be so helpful, AND it'll be something pretty to look at.
Makeover a plain memo board with spray paint and a vinyl monogram used as a reverse stencil. pitterandglink.com #monogram #Silhouette

Want to Check Out More Silhouette Projects?
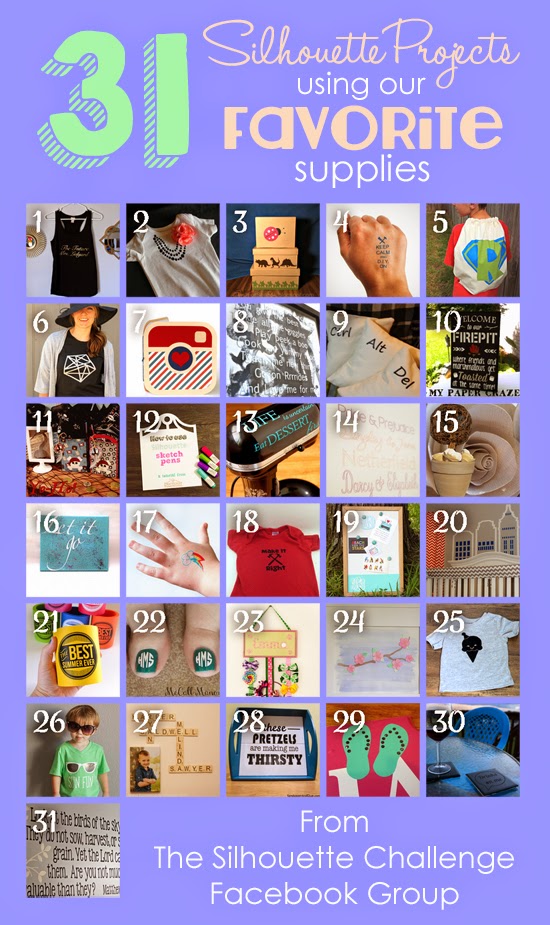
Thirty of my Silhouette Challenge buddies and I are all sharing projects on our blogs today that use our favorite Silhouette supplies, so peruse the projects below for a wealth of Silhouette inspiration!
A Gift for the Bride-to-Be Silhouette Challenge: My Favorite Things My Favorite Things Keepsake Box Printable Tattoos for Crafters & DIYers Super Hero Backpacks Geometric Two Tone Shirt Refashion Instagram Paper Album Reasons I Love Daddy Ctrl Alt Del Pillows Outside Decor: DIY Pallet Board Sign Yo-Ho It's a Pirate Party How To Use Silhouette Sketch Pens Combining My Favorite Things, Baking and Crafting - July Silhouette Challenge Pride & Prejudice Subway Style Art Favorite Silhouette Challenge Just umm, Let it Go Temporary My Little Pony Tattoos Mike Holmes Baby Onesie Monogram It: A Memo Board Makeover Super Room Redo The Best Summer Ever Freebie and Tutorial Summertime Toes Crafty Girls Hair Accessories Holder Watercolor Wall Art Ice Cream Cone T-Shirt Sun Fun Shirt Family Wall Art: Scrabble Edition Serving Tray Upcycle Making Custom Rhinestone Designs Etched Glass Coasters Church Nursery Wall Quote
1. Just a Girl and Her Blog // 2. The Frill of Life // 3. A Time For Seasons // 4. The Thinking Closet // 5. Ginger Snap Crafts // 6. Grey Luster Girl // 7. Simply Kelly Designs // 8. Home At Eight // 9. Please Excuse My Craftermath... // 10. My Paper Craze // 11. Mama Sonshine // 12. Practically Functional // 13. Adventures in All Things Food // 14. Two Purple Couches // 15. Dragonfly & Lily Pads // 16. Sowdering About // 17. Cutesy Crafts // 18. My Mom Made That // 19. Pitter and Glink // 20. Pineapples And Pinecones // 21. Dream a Little Bigger // 22. McCall Manor // 23. TitiCrafty // 24. unOriginal Mom // 25. Persia Lou // 26. Lil Mrs Tori // 27. Home. Made. Interest. // 28. Sandpaper and Glue // 29. Silhouette School // 30. Creative Ramblings // 31. My Favorite Finds
Have an awesome Monday!