Friday, March 4, 2016

DIY Paper Flower Planner Clips

This post contains affiliate links.  Thanks for supporting Pitter & Glink!
Hey, y'all!  Are you into the whole planner craze?  I want to be, but I struggle with organization quite often.  What can I say?  It's just not my strong-suit.  But I do love Bible journaling as I'm sure you know (especially if you follow me on Instagram).  I love that lots of little bits and bobs that are used by planner fanatics can be used in Bible journaling as well.  My favorite?  Planner clips!  I use planner clips in my planner and in my journaling Bible.  I recently made some really fun paper flower planner clips, and I want to show you how you can quickly and easily make some for yourself.
DIY Flower Planner Clips: Make cute floral planner clips from paper! An easy way to add personality to your planner. | www.pitterandglink.com
I love that the clippies are three dimensional and that they have pretty little pearls and gems in the center.  Read on for the full tutorial...

Monday, July 14, 2014

{Monogram It: A Memo Board Makeover}

Hey, y'all!  Do you have unloved stuff in your closets just waiting for a makeover?  I have stuff pretty much everywhere waiting for a makeover.  My hoarding tendencies cause me to buy all types of things and store them until I decide to make them over.  It really gets annoying after a while, and I just decide that it's either make it over or throw it out.  I've had a cork board in my closet for a couple of years now.  It was in my craft room before I did the huge craft room makeover.  It didn't make the cut in the new room, and it's just been hanging out in the top of the closet ever since.  This week I decided that it needed a makeover, and I needed a memo board near my computer, so it has now been transformed into a lovely monogrammed memo board.
Makeover a plain memo board with spray paint and a vinyl monogram used as a reverse stencil. pitterandglink.com #monogram #Silhouette
This is the sad little memo board before.
Makeover a plain memo board with spray paint and a vinyl monogram used as a reverse stencil. pitterandglink.com #monogram #Silhouette
The first thing I did to the board was tape the middle off so that I could spray paint the wood frame.  I used blue painter's tape and newspaper to cover the entire middle of the board.
Makeover a plain memo board with spray paint and a vinyl monogram used as a reverse stencil. pitterandglink.com #monogram #Silhouette
I spray painted the frame with Krylon's gold metallic spray paint.  I'm going to skip a few steps now because there was a craft fail in the middle.  We're just going to pretend like it didn't happen.  After the fail, I taped of the frame of the board.
Makeover a plain memo board with spray paint and a vinyl monogram used as a reverse stencil. pitterandglink.com #monogram #Silhouette
I sprayed the cork part of the board with white spray paint.  Then I cut a monogram from vinyl with my Silhouette.  (You can learn how to create a monogram with your Silhouette in this post.)  Cutting vinyl with my Silhouette is definitely my favorite use for my Silhouette because I can create decals, stencils, and reverse stencils, which is what I used for this project.
Makeover a plain memo board with spray paint and a vinyl monogram used as a reverse stencil. pitterandglink.com #monogram #Silhouette
I transferred the monogram to the bottom left corner of my memo board.  (I should have used a different color vinyl so that you could see the monogram better, but hopefully you can still see the white on white.)  I taped around the monogram so that I would have a rectangle roughly 1/4 the size of the cork part of the board.
Makeover a plain memo board with spray paint and a vinyl monogram used as a reverse stencil. pitterandglink.com #monogram #Silhouette
I then sprayed that section with Valspar's spray paint in nautical.  (It's the same spray paint I used for my Thrift Store Lamp Makeover.)  White the paint was still a bit tacky, I removed all the tape and the monogram sticker.  I normally do this to keep the paint from peeling, which can happen sometimes when the paint is completely dry.  I had a few places where the white needed a touch up, so I just used craft paint and a small brush to fix those places.  There was one place where a little of the white spray paint got on the inside edge of the gold frame.  I used a gold Sharpie to correct that.  Then my memo board makeover was complete!
Makeover a plain memo board with spray paint and a vinyl monogram used as a reverse stencil. pitterandglink.com #monogram #Silhouette
Isn't it fun?  The push pins are simply gold tacks with pieces of my Polymer Clay Faux Agate super glued on.  They pull together all the colors that I used on the memo board.
Makeover a plain memo board with spray paint and a vinyl monogram used as a reverse stencil. pitterandglink.com #monogram #Silhouette
I'm going to attach the memo board to the inside of my computer armoire that's in the living room.  The board is going to be so helpful, AND it'll be something pretty to look at.
Makeover a plain memo board with spray paint and a vinyl monogram used as a reverse stencil. pitterandglink.com #monogram #Silhouette

Want to Check Out More Silhouette Projects?
Thirty of my Silhouette Challenge buddies and I are all sharing projects on our blogs today that use our favorite Silhouette supplies, so peruse the projects below for a wealth of Silhouette inspiration!
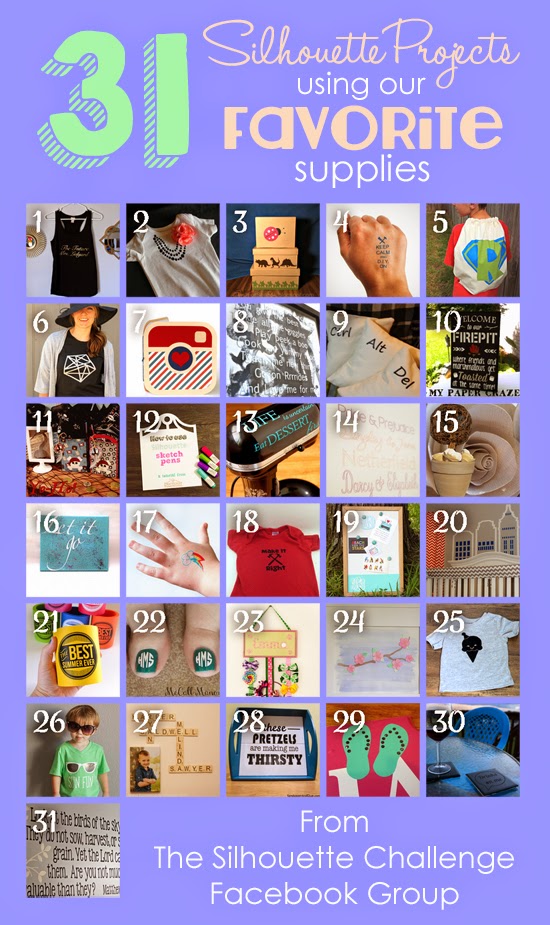
A Gift for the Bride-to-Be Silhouette Challenge: My Favorite Things My Favorite Things Keepsake Box Printable Tattoos for Crafters & DIYers Super Hero Backpacks Geometric Two Tone Shirt Refashion Instagram Paper Album Reasons I Love Daddy Ctrl Alt Del Pillows Outside Decor: DIY Pallet Board Sign Yo-Ho It's a Pirate Party How To Use Silhouette Sketch Pens Combining My Favorite Things, Baking and Crafting - July Silhouette Challenge Pride & Prejudice Subway Style Art Favorite Silhouette Challenge Just umm, Let it Go Temporary My Little Pony Tattoos Mike Holmes Baby Onesie Monogram It: A Memo Board Makeover Super Room Redo The Best Summer Ever Freebie and Tutorial Summertime Toes Crafty Girls Hair Accessories Holder Watercolor Wall Art Ice Cream Cone T-Shirt Sun Fun Shirt Family Wall Art: Scrabble Edition Serving Tray Upcycle Making Custom Rhinestone Designs Etched Glass Coasters Church Nursery Wall Quote
1. Just a Girl and Her Blog // 2. The Frill of Life // 3. A Time For Seasons // 4. The Thinking Closet // 5. Ginger Snap Crafts // 6. Grey Luster Girl // 7. Simply Kelly Designs // 8. Home At Eight // 9. Please Excuse My Craftermath... // 10. My Paper Craze // 11. Mama Sonshine // 12. Practically Functional // 13. Adventures in All Things Food // 14. Two Purple Couches // 15. Dragonfly & Lily Pads // 16. Sowdering About // 17. Cutesy Crafts // 18. My Mom Made That // 19. Pitter and Glink // 20. Pineapples And Pinecones // 21. Dream a Little Bigger // 22. McCall Manor // 23. TitiCrafty // 24. unOriginal Mom // 25. Persia Lou // 26. Lil Mrs Tori // 27. Home. Made. Interest. // 28. Sandpaper and Glue // 29. Silhouette School // 30. Creative Ramblings // 31. My Favorite Finds
Have an awesome Monday!

Thursday, September 5, 2013

{My Decorated Dollar Store Notepad}

Hey, y'all!  I've been trying to adjust to the new school year, so I haven't been blogging as much as I'd like.  I do have a post to share with you today, though.  At the beginning of August, I had the pleasure of hanging out at See Vanessa Craft to help her out after the birth of her beautiful baby girl.  I shared this project.  (You can find the original post HERE.)  As a teacher, I love school supplies.  One place that has school supplies for a great price is the dollar store.  Unfortunately those supplies aren't always the cutest, and being the "girly girl" I am, I really need my school supplies to be cute.  Luckily with a little bit of creativity, you can easily make dollar store school supplies look like their more expensive counterparts.
One easy dollar store school supply you can makeover is a notepad.  You need a few simple items for the makeover:
  • Dollar store notepad
  • Scrapbook paper
  • Mod Podge
  • Washi Tape
  • Embellishments (optional)
  • Mod Podge 
  • Scissors
  • Paint brush or foam brush
  • Wax paper
To begin, cut a piece of scrapbook paper the size of your notepad cover.
Place a piece of wax paper between the cover of the notepad and the paper inside to protect them.  Use your brush to apply a thin layer of Mod Podge on your notepad cover.  Stick your paper to the cover and smooth out any air bubbles.  To keep the Mod Podge from making the cover curl up while drying, put a heavy book on top of it.
Next it's time to add washi tape.  You can add as much washi tape as you would like in any pattern you would like.  I added a few stripes at the bottom of my notepad cover and one stripe at the top.
And because I love bling--especially pink bling--I added an adhesive strip of pink rhinestones in the middle of my green washi stripe as my notepad's finishing touch.
No one will know that your fabulous new notepad actually came from the dollar store!
And to take it one step further, you can decorate a pencil with the same washi tape to create a coordinating set.  Make a notebook and pencil set with your child to get him or her excited about school starting, or make a set as a gift for your child's teacher. And, of course, you can always just make a set for yourself!  :)

Friday, August 9, 2013

{Back to School Week: DIY Perpetual Calendar}

Hey, y'all!  Welcome to the last day of Back to School Week here at Pitter and Glink.  This morning, I want to share the tutorial for a fun DIY project that I look forward to hanging in my classroom: my DIY Perpetual Calendar.
I must admit that I had to Google what the name of this type of calendar is, and if you didn't know either, then we both learned something during Back to School Week, which I think is very appropriate. Anyway, to make this I started with a chipboard shape that I bought from Hobby Lobby.
I traced the shape on a piece of 12x12 scrapbook paper.
I cut out the traced shape.
Then adhered it to the chipboard shape with Mod Podge.
I then used E-6000 to glue three magnetic clips on the top of the shape.  I only used magnetic clips because they were all I could find at Walmart when I went, but they actually worked really well because of the flat backs.
To make the months and numbers for dates, I started by cutting twenty-six rectangles from coordinating scrapbook paper.  I then used my Silhouette to cut the names of the months, numbers 0-3 (for the first number of a date), and numbers 0-9 (for the second number of a date) from card stock.
I taped and glued each rectangle to the back of another rectangle and then glued a month on each side.  I did the same thing with the numbers.  
 In the end I had six rectangles with a month on each side, two rectangles with a number (0-3) on each side, and five rectangles with a number (0-9) on each side.  Then all that was left was clipping the months and numbers on the chipboard shape.
Since I don't always remember to write the date on the board at school, I figure I can hang the calendar in my room and put a first period student in charge of changing the date each day.
The students will always know the date now, and I'll have something pretty in my classroom to look at.  I'll be back this afternoon for one more post, but in the meantime if you've missed any of my Back to School Week posts, you can catch up {HERE}.

Thursday, August 8, 2013

{Back to School Week: Glittered Dollar Store Stapler}

Hey, ya'll!  I always hate to see summer vacation end, but it's almost over whether I want it to be or not.   Having fun, new "teacher stuff" makes the transition from vacation to work a little easier, so I always work on a few back-to-school projects during the summer.  One of my latest projects involves a dollar store stapler and a lot of glitter.
The dollar store has a decent selection of school supplies, but they're not often super cute, so I picked up this stapler on a recent visit with hopes of making it fabulous.
I decided to spray the stapler gold, so I started the process by taping off the silver part of the stapler that houses the staples.
Then I sprayed the purple plastic with Krylon's metallic gold spray paint.
I know you're probably thinking that spray paint doesn't stick really well to plastic, and you're right.  I knew that I was going to cover the paint, though, so I wasn't too worried about that.  What did I cover it with?  Glitter of course!
I got out my gold extra fine glitter.  Extra fine glitter is the bee's knees because it has tons of sparkle, and it isn't all chunky and rough when you use it.
I mixed some of the glitter with Mod Podge and brushed the mixture on the stapler.  I used a couple of coats to make sure I had lots of glitter on the stapler.  I took off the tape when everything was dry, and now I have a super classy stapler that cost me a dollar.  A dollar, people!
How fun is a gold glittered stapler?!
Now I want to glitter everything!  A tape dispenser!  My desk chair!  The door to my classroom!  Okay, I'm probably getting carried away, but you get the point.  I love my new stapler, and I know it will make me a little happier when I return to school.  You know what else will make me happy?  The notepad and pencil the stapler is sitting on in the picture above.  You can find the tutorial for that today at See Vanessa Craft.  And tomorrow I hope you'll come back here for the last day of Back to School Week.

Wednesday, August 7, 2013

{Back to School Week: Sharpie Doodled Clipboard}

Hey, y'all!  Welcome to day three of Back to School Week.  So far I've shared a giveaway and some useful printables with you.  Today I want to share a project.  As a teacher, I love having a clipboard or two in my classroom to keep up with signed-out books, attendance, student behavior, etc.  While clipboards are useful, they're often plain and boring, but you can easily transform a plain clipboard with Sharpies.  (I originally posted this at Through the Eyes of the Mrs.)
Of course, the main thing you need to get started is a clipboard.
I bought a small clipboard from the dollar store.
You will also need a ruler, Sharpies and some type of pattern to follow, unless you want to make up your own design.  I wanted a trendy aztec pattern on my clipboard, so I simply did a Google image search.  I found a pattern that I liked, and I loosely based my design off of it.  I used a ruler to help me make lines with different color Sharpies, and I filled those lines in with circles, squares, rectangles and squiggly lines.
When I finished with the Sharpies, I liked the design, but it was a bit dull.  I got out my Elmer's metallic paint pens, and I doodled some more with those until I loved the finished design.
I messed up my design a bit a couple of times, but when I did, I just fixed the mistake with a darker Sharpie and/or changed up the pattern a little.
It really wasn't hard at all.  Actually, the doodling was a bit therapeutic.  So whether you need a new clipboard or a bit of therapy, this little project is for you!
You can find another of my clipboard transformations {HERE}.  
Make sure to come back tomorrow for day four of Back to School Week!

Tuesday, August 6, 2013

{Back to School Week: Teacher's Note Printables}

Hey, y'all!  It's day two of Back to School Week here at Pitter and Glink.
As a teacher, I love school supplies.  When I get a new notebook, notepad, or a nice set of pencils, I am on cloud nine.  Yes, this may be a bit nerdy, but, hey, I'm a teacher.  I'm allowed to be nerdy.  Today I'm sharing two printable teacher's notes so that other teachers can "nerd out" a little with me over some new classroom supplies.
If you're not a teacher, you can print a few of these to give your child's teacher as a beginning of the year gift.  It's a little gesture that would let your child's teacher know that you care.  
Being a teacher--as with many other professions--is becoming a more difficult job every year.  Salaries are being cut all over the country, yet teachers are expected to perform at an even higher level than ever before.  I'm not moaning and groaning by any means.  I just don't know if parents realize how far a little appreciation can go when it comes to teachers.  We do our job for your children and knowing that you recognize that gives us an extra little push that keeps us doing our jobs day after day.
You can download the printables below.


These printables are for personal use only--you may not claim them as your own, resell, or redistribute them.  (You may give the printed version as a gift to someone, though.)  To download them, simply click on the arrow with a line under it.  Before printing, remember that the images are sized to 4x6.  Last year I also shared a printable for teachers, or anyone for that matter, with my readers.  You can find my desktop note holder printables {HERE}.  Enjoy the printables and don't forget to come back around lunchtime today for another freebie--this time for the students.